
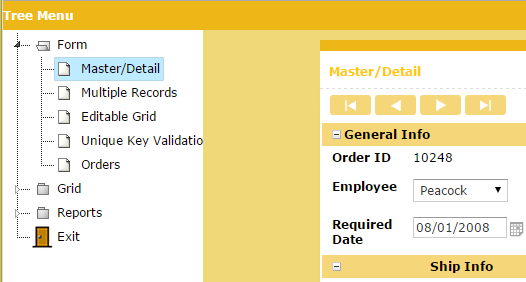
Tree menu
This sample demonstrates how to create a tree menu.
 |
||
Creating the menu
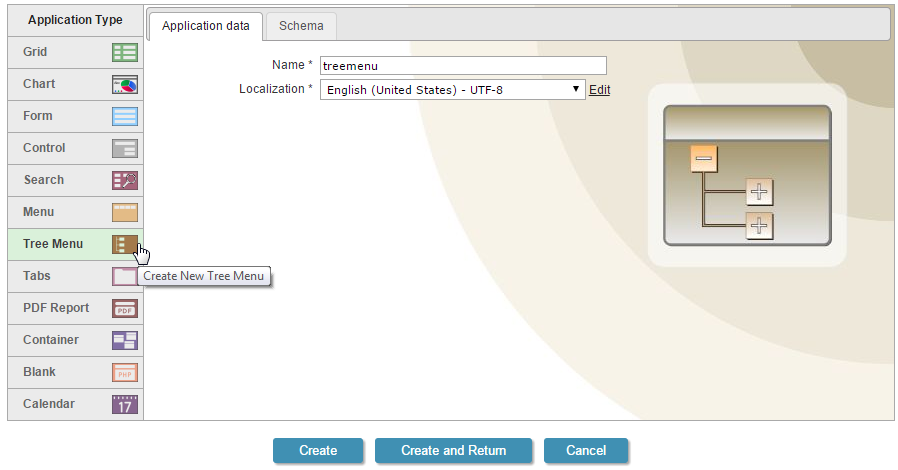
1. Create a new Tree menu application.
 |
||
Creating the menu items
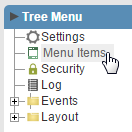
2. Click in Menu Items to define an hierarch used in the menu.
 |
||
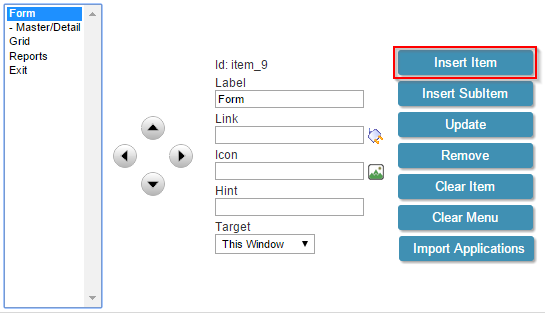
3. Add the main items. Enter Form in the item Label and click in Insert Item.
 |
||
4. Repeat the step 4 and add the items Grid and Reports.
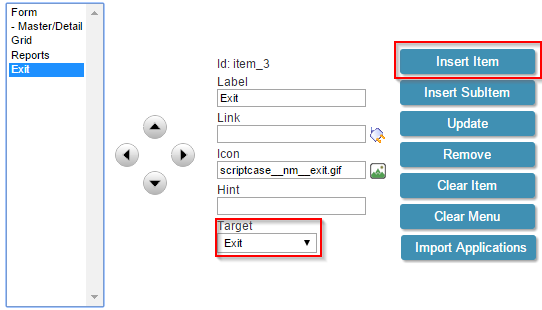
5. Add an item with an option to close the application. Enter Exit in Label, in the Target choose Exit and click in Insert Item.
 |
||
Creating the subitems
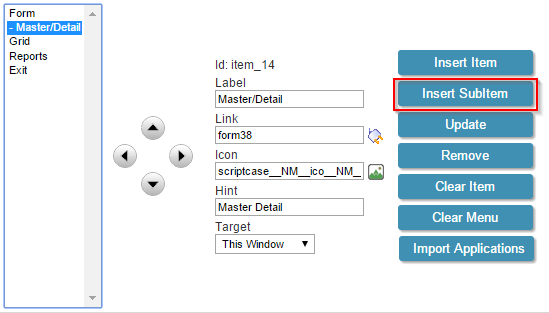
6. To create the subitem it is necessary to select the item and then click in Insert SubItem.
7. Create a sub item on Form. Enter all required data (Label, link, icon, hint and target). See the image below.
 |
||
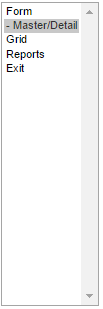
8. Look the item Master/Detail. It is positioned one level inside of Form.
 |
||
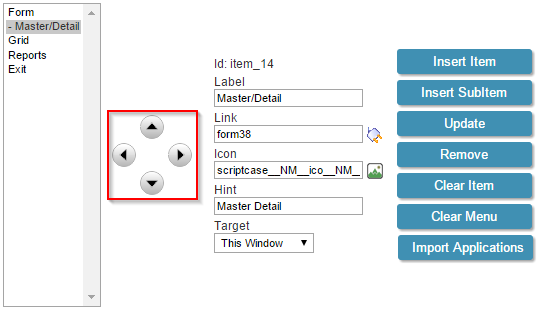
9. Once the menu is completed it ispossible to change the items positions and levels using the directional buttons.
 |
||
10. Use the table below (with items and sub items used in this sample) to create a menu. The steps are the same described before.
| Item (Label) | Application |
| Form | |
| - Master/Detail | form38 |
| - Multiple Records | form40 |
| - Editable Grid | form39 |
| - Unique Key Validation | form44 |
| - Orders | form53 |
| Grid | |
| - Group By - Customers x States | grid05 |
| - Pivot Table Summary | grid29 |
| - Submenu | |
| - - Simple Drill Down | grid14 |
| - - Customers | grid20 |
| Reports | |
| - Invoice | pdf03 |
| - Business Card | pdf02 |
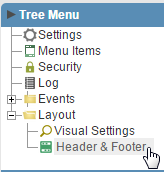
Enabling the Header
11. Open the folder Layout on the menu and click on Header.
 |
||
12. Check the option Yes in Display Header.
 |
||
![]()